
Table of Contents
- What You'll Need Before Starting
- Essential Suspension Trainer Exercises for Beginners
- Suspension Trainer Form Tips for Proper Alignment
- A Complete Beginner TRX Workout Routine
- Building Your Suspension Training Workout Plan
- Progressive Overload and Adjusting Intensity
- Common Form Errors and How to Fix Them
- Frequently Asked Questions
Last Updated: October 6, 2026
What You'll Need Before Starting
Suspension training requires minimal equipment to get started. The American College of Sports Medicine recommends bodyweight resistance training as an effective method for building functional strength and muscular endurance, making suspension training ideal for home workouts.
At PureFitnessWarehouse.com, we carry the Adjustable Suspension Training Belt for Fitness Strength and Yoga Workouts, featuring industrial-strength nylon webbing with a load-bearing capacity up to 300 kg, adjustable length up to 225 cm, soft foam handles to prevent slipping, and a rust-proof zinc alloy buckle.

Before your first session, check your anchor point: it must be secure and at approximately shoulder height. Test stability with your full body weight before beginning any exercise.
Essential Suspension Trainer Exercises for Beginners
Suspension training exercises build functional strength through bodyweight resistance, engaging stabilizer muscles and improving core stability, making these suspension training exercises ideal for developing balanced fitness.
Upper Body Movements
Upper body suspension exercises develop postural alignment and shoulder stability:
Suspension Trainer Chest Press
- Face away from the anchor point with straps at mid-length
- Lean forward at an angle, feet together
- Keep your body straight from head to heels
- Push yourself back to the starting position
- Focus on eccentric control during the return phase
This compound movement targets your chest, shoulders, and triceps. Beginners should start with a steeper (easier) body angle and gradually decrease it as strength builds.
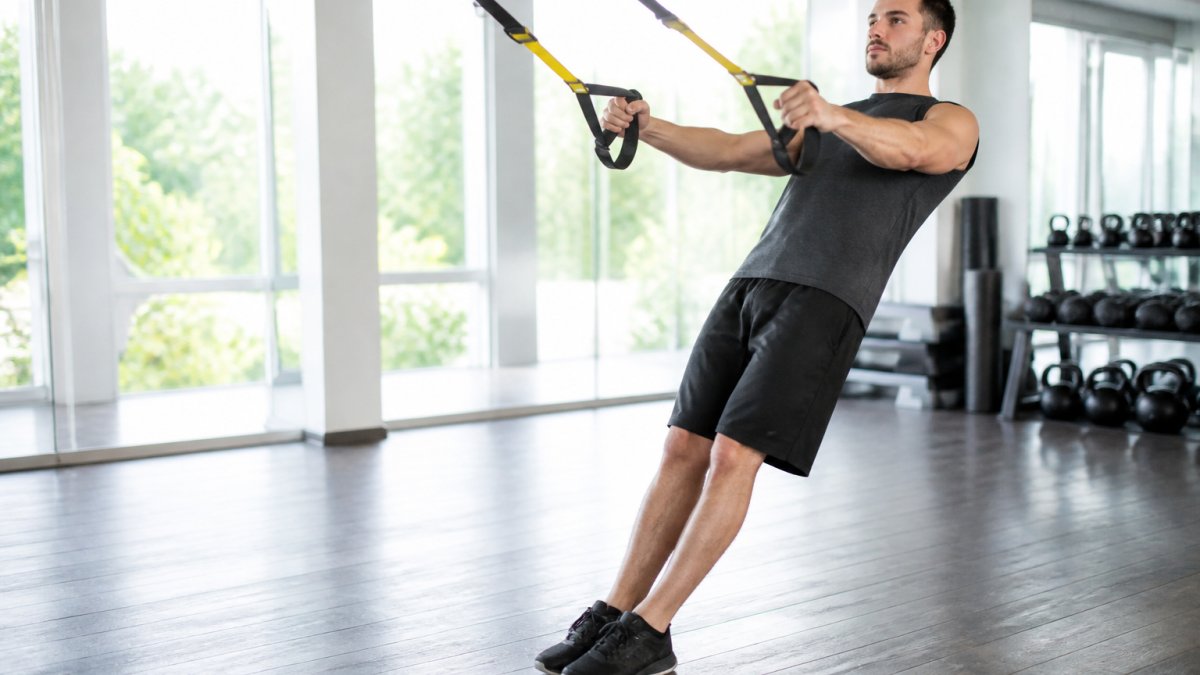
Inverted Row
- Face the anchor point with straps at mid-length
- Lean back with heels on the ground
- Pull your chest toward the handles
- Squeeze your back muscles at the top
- Lower yourself with control
The inverted row builds posterior chain strength and pulling power for balanced upper body development.
Bicep Curls
- Hold the handles with arms extended
- Lean back slightly to create resistance
- Curl your hands toward your face
- Keep elbows stationary throughout
- Lower with control
Bicep curls isolate the arm muscles while engaging your core. Adjust your body angle to modify intensity.
Lower Body and Lunge Mechanics
Lower body suspension exercises develop leg strength and improve balance, challenging your quads, glutes, and hamstrings.
Suspension Trainer Lunge
- Hold the handles at chest height
- Step forward with one leg
- Lower your body until both knees bend at 90 degrees
- Push through your front heel to return to standing
- Alternate legs for balanced development
Lunge mechanics require knee alignment: your front knee should track over your ankle, not past your toes.
Single-Leg Squat
- Hold the handles lightly for balance
- Stand on one leg
- Lower your body by bending the standing leg
- Keep your chest upright
- Push through your heel to return to standing
Single-leg training builds unilateral strength and identifies imbalances between sides. Start with light hand support and gradually reduce assistance.
Core Stability and Plank Variations
Core stability is fundamental to all suspension training, building isometric strength and postural control.
Suspension Trainer Plank
- Face the anchor point with straps at mid-length
- Place forearms in the handles
- Extend your legs behind you
- Keep your body straight from head to heels
- Hold for 30-60 seconds
This plank variation is harder than a floor plank because your feet are elevated, requiring greater core engagement. Maintain neutral spine alignment throughout.
Pike
- Start in a plank position with feet in the handles
- Keep your arms straight
- Pike your hips toward the ceiling
- Lower back to plank with control
- Repeat for 8-12 repetitions
The pike develops core strength and shoulder stability simultaneously, requiring significant abdominal engagement.
Suspension Trainer Form Tips for Proper Alignment
Proper form prevents injury and maximizes results. Body angle determines difficulty: steeper (closer to vertical) is easier, flatter (closer to horizontal) is harder.
Maintain neutral spine alignment throughout every movement: head, spine, and pelvis in a straight line.
Engage your core before each repetition.
Control the eccentric phase, the lowering portion of each movement.
A Complete Beginner TRX Workout Routine
A complete beginner suspension training workout routine combines upper body, lower body, and core exercises into one session balancing pushing, pulling, and bracing. In your first four to six weeks, prioritize repetition quality over fatigue.
Warm-Up (5 Minutes)
Warm-ups raise core temperature and rehearse the movement patterns you are about to load. Keep the straps long (handles around hip height) so the warm-up is easy.
- Arm circles and shoulder rolls, 30 seconds each direction
- Bodyweight squats, 10 reps, slow tempo
- Assisted strap squat, 10 reps holding the handles for balance
Main Circuit
Perform the exercises in order, resting 60 seconds between sets and 45 seconds between exercises. If your form breaks down before the target rep range, stop the set.
| Exercise | Reps / Time | Sets | Rest |
|---|---|---|---|
| Suspension Chest Press | 8-12 reps | 3 | 60 sec |
| Inverted Row | 8-12 reps | 3 | 60 sec |
| Suspension Lunge | 10 reps per leg | 2 | 45 sec |
| Suspension Plank | 30-45 sec | 2 | 45 sec |
| Bicep Curls | 10-12 reps | 2 | 45 sec |
| Pike | 6-8 reps | 2 | 60 sec |
Cool-Down (5 Minutes)
Use the straps for assisted stretching while muscles are warm. Hold each stretch 20-30 seconds and breathe slowly.
- Assisted chest stretch, hold the handles behind you, lean forward gently
- Assisted hamstring stretch, place one heel in a handle, keep the leg straight, hinge at the hips
- Lat stretch, hold both handles overhead, sit your hips back
Week-by-Week Progression
Progress one variable per week, not all at once.
- Weeks 1-2: Learn the movements. Use the easiest body angle (steep, close to vertical). Stop each set two reps short of failure.
- Weeks 3-4: Add one rep per set or one set per exercise. Keep the same angle.
- Weeks 5-6: Flatten your body angle slightly on the chest press and row. Add a second set to the lunge and plank.
Weekly Schedule
Perform this routine 2-3 times per week with at least one rest day between sessions:
- Monday: Full session
- Tuesday: Rest or light walking
- Wednesday: Full session
If new to resistance training, start with two sessions per week for two weeks, then add a third once you complete every set with clean form and no lingering soreness.
Building Your Suspension Training Workout Plan
Progressive overload is essential for continued improvement. Increase difficulty gradually by adjusting body angle, reducing hand support, or adding repetitions.
Adjustable Suspension Training Belt for Fitness Strength and Yoga Workouts →
Start with 2-3 sessions weekly to allow recovery while establishing consistent movement patterns, then progress to 4 sessions as you adapt.
Track your performance: record repetitions, sets completed, and body angle used. This data helps you identify progress and plan progression.
Progressive Overload and Adjusting Intensity
Progressive overload drives strength gains and prevents plateaus.
Body Angle Adjustment Decrease the angle between your body and the ground.
Reducing Hand Support Use one hand instead of two for selected exercises.
Increasing Volume Add more repetitions or sets to your routine.
Many practitioners find that strength training progression guidelines recommend increasing volume by 5-10% weekly.
Common Form Errors and How to Fix Them
Most beginner guides list form errors but don't explain how to diagnose them mid-set or what to change on the straps. Use the cues below as a troubleshooting checklist; if a fix doesn't work in one session, drop back to an easier angle and rebuild.
Sagging Hips During Planks
What it looks like: Your lower back arches and your hips drop toward the floor. The strap handles may also pull your forearms together.
Why it happens: Core fatigue, the deep abdominal muscles give out before your shoulders do.
How to fix it:
- Shorten the hold to 15-20 seconds and rebuild from there.
- Raise the straps so the handles sit closer to your shoulders, a higher anchor reduces the lever arm on your core.
- Squeeze your glutes and brace as if bracing for a light punch before every rep.
Strap Rubbing on Your Arms
What it looks like: The webbing drags across your forearms during chest presses, rows, or curls, leaving red marks and breaking your rhythm.
Why it happens: The straps are too long, so handles sit too low relative to your shoulders, or your hands are turned the wrong way.
How to fix it:
- Shorten the straps so the handles sit at mid-chest when you stand tall.
- Rotate your hands so your palms face each other or face down, depending on the exercise.
- Step your feet closer to the anchor point to reduce the angle of pull across your arms.
Knees Extending Past Toes During Lunges
What it looks like: Your front knee travels forward over your toes and your heel lifts.
Why it happens: Your stride is too short, increasing your shin angle as you descend.
How to fix it:
- Take a longer step forward, roughly one and a half times your normal walking stride.
- Keep your front shin close to vertical and drive through your mid-foot and heel.
- Hold the handles lower (around waist height) so you are not pulling yourself forward.
Incomplete Range of Motion
What it looks like: You stop short at the bottom of a press or row, or you do not fully extend at the top.
Why it happens: Beginners trade range for reps to hit a target number.
How to fix it:
- Reduce the rep target by two and complete every rep through full range.
- Lower the straps slightly so the bottom position is reachable without strain.
- Pause for one second at the bottom of each rep to confirm you are actually there.
Momentum-Driven Repetitions
What it looks like: Your hips swing, your body bobs, and the straps go slack between reps.
Why it happens: The exercise is too hard for the current angle, so you recruit momentum to finish.
How to fix it:
- Make the angle steeper (stand more upright) to reduce the load.
- Slow the lowering phase to a three-second count.
- Stop the set the moment the straps go slack, that is your true rep ceiling.
Inconsistent Body Tension
What it looks like: Your torso twists, one hip hikes, or your shoulders roll forward during a set.
Why it happens: You are not bracing before the rep, or one side is stronger than the other.
How to fix it:
- Brace your core and squeeze your glutes before every rep, not just the first one.
- Narrow your stance slightly to reduce side-to-side sway.
- If one side consistently fails first, add one extra set on that side using a single-arm or single-leg variation.
Progressive Overload for Home Users
Once your form is clean, make the exercise harder without adding weight. Suspension training gives you three dials:
- Strap length. Shorter straps raise the handles and reduce the load on pressing and rowing movements. Longer straps lower the handles and increase the load. Move the straps in small increments, about one hand-width at a time.
- Body angle. The closer your body is to horizontal, the harder the exercise. Walk your feet forward to flatten the angle; walk them back to make it easier.
- Base of support. Two feet is easiest. One foot, or one arm, is hardest. Introduce single-limb work only after you can complete all sets with two limbs and clean form.
Change one dial per week: week one add a rep, week two lengthen the straps one notch, week three flatten your angle slightly. Changing all three at once makes it impossible to tell what worked.
When to Regress vs. When to Progress
Rule of thumb: if you cannot complete the target reps with clean form for two consecutive sessions, regress the exercise (steeper angle, shorter range, more hand support). If you finish every set with two reps left in the tank for two consecutive sessions, progress it (flatter angle, longer straps, single-limb variation).
Frequently Asked Questions
How many times a week should a beginner use a suspension trainer?
Beginners should start with 2-3 sessions per week, allowing at least one rest day between workouts. This frequency builds functional strength and muscular endurance while giving your stabilizer muscles time to recover. As your body adapts over 4-6 weeks, you can increase to 3-4 sessions weekly. Consistency matters more than frequency, so establish a sustainable routine before adding extra sessions.
Can you build muscle with suspension training exercises?
Yes. Suspension training creates bodyweight resistance that challenges compound movements and stabilizer muscles throughout your full-body engagement. By progressively increasing your workout volume and adjusting body angle for greater resistance, you trigger muscle growth.
How do you adjust suspension trainer exercises to make them easier?
Reduce difficulty by decreasing the angle of your body relative to the anchor point, bringing your feet closer to the equipment. For example, in a chest press, move your feet forward so your body is more upright. You can also reduce range of motion or perform isometric holds at easier positions. As you build strength, gradually increase the body angle and range of motion to progress your training.
What muscles does suspension training work?
Suspension training engages your entire body through compound movements and stabilizer activation. Upper body work targets your chest, shoulders, back, and biceps through pressing and pulling patterns. Lower body exercises develop your legs, glutes, and posterior chain through lunge mechanics. Core stability exercises strengthen your abdominals and deep stabilizers. The constant need for balance and postural alignment means every muscle group contributes to functional strength.